How to Make This Viral Technique That Gives
Ever felt that small, quiet joy when a meal tastes unexpectedly perfect? Maybe it was the first time your pasta was al dente, or when browned butter made a weeknight dinner special. These moments show that cooking can be both reliable and exciting.
This guide combines two famous hacks for a secret cooking technique. You’ll learn the two-minute boil pasta method and the beurre noisette trend. I tested these methods with real brands and kitchen gear, so you get practical steps, not vague tips.
In this article, you’ll find out why these viral cooking techniques work. You’ll learn about the science behind them and how small gear choices can make a big difference. You’ll also discover how to cook perfectly every time by controlling heat, timing, and lids.
Key Takeaways
- The two-minute boil relies on trapped residual heat to finish pasta for steady doneness.
- Browned butter develops flavor through Maillard reactions and careful timing.
- Tight-fitting lids, appropriate pasta volumes, and light-colored pans help repeatable success.
- These internet-famous cooking hacks are repeatable when you follow precise, tested steps.
- You can adapt both techniques across gluten-free pasta, seafood, and vegetable dishes.
What Is the Viral Cooking Technique and Why It Works
Have you seen clips that show how to make perfect pasta or nutty browned butter easily? These tricks use simple tools and timing to finish cooking food off the heat. They make food taste great and feel magical because they save time.
Definition and modern examples
For example, the two-minute pasta boil is a hit. You boil pasta for two minutes, then turn off the heat and let it finish cooking. Browned butter, or beurre noisette, is another favorite. It’s made by melting butter until it turns golden and smells nutty.
Food science behind the methods
These methods work because of residual heat and carryover cooking. Pasta keeps cooking after the heat is off because of trapped heat. Carryover cooking is also used for roasted meats. It works well in pots too.
Why these ideas go viral
Platforms like TikTok and Instagram love quick, easy recipes. People share videos of steam rising or golden butter. These recipes are simple, easy to follow, and promise great results.
Practical takeaway
These cooking tricks are based on science, not tricks. By controlling things like lid fit and butter choice, they work every time. They help you cook like a pro without spending hours in the kitchen.
Essential Equipment and Ingredients for Perfect Results
To get great results, you need the right tools and ingredients. A tight lid keeps steam in, keeping water hot. A heavy pot, like a Dutch oven, helps cook evenly.
Choose the right pot and lid for trapped heat
Choose a pot with a lid that fits well. A loose lid lets heat out, making pasta undercooked. Make sure the pot isn’t too full to keep water temperature steady.
Use a tight lid or a cover to stop cooking fast. An accurate timer makes the process easy and stress-free.
Pan selection for browning and color control
For browning butter, use pans that are light in color. This lets you see when it turns amber. Dark pans can burn the butter before you see the color change.
Start with cold butter cut into even pieces. Have a bowl ready to stop cooking when you see amber. Use wooden spoons or a silicone spatula to stir without scratching the pan.
Ingredient tips: butter, pasta shapes, and portions
Use unsalted butter for better control. Salted butter browns faster and can make food too salty. Plant-based spreads don’t have the same flavor as real butter.
Choose pasta shapes that fit the dish. Thicker shapes might need more time to rest. Don’t overcrowd the pot to ensure even heating.
Store browned butter in glass jars in the fridge for up to two weeks. Or freeze it in ice-cube trays for easy use. For more kitchen tips, check out viral TikTok recipes that work in.
| Tool or Ingredient | Why it matters | Practical tip |
|---|---|---|
| Tight-fitting pot lid / Dutch oven | Traps steam to maintain water temperature during resting | Measure water and avoid overloading for consistent carryover cooking |
| Light-colored pan (stainless or enamel) | Shows milk solids turning amber for precise browned butter | Start cold with even butter pieces; have a heatproof bowl ready |
| Unsalted butter | Gives control over seasoning and predictable browning | Use unsalted for browned butter; refrigerate or freeze portions |
| Plant-based butter | Lower Maillard reaction, different flavor profile | Use for vegan dishes but expect no classic browned-butter aroma |
| Accurate kitchen timer | Makes methods repeatable | Time boiling, resting, and cooling to the second |
| Wooden spoon / silicone spatula | Stirs safely without damaging cookware | Use gentle motions to prevent splatter and uneven browning |
| Heatproof bowl | Stops carryover cooking immediately | Pour browned butter into the bowl to halt cooking |
| Portioned storage (jars, ice-cube trays) | Easy reheating and meal prep | Freeze butter cubes or refrigerate jars up to two weeks |
These tips will make viral methods work in your kitchen. Keep the right equipment and ingredients ready. Small steps in gear and ingredients can make your dishes perfect.
Step-by-Step Guide to the Two-Minute Boil Pasta Method
This guide shows a simple way to cook pasta using leftover heat. It covers everything from prep to fixing common issues. This method is great for busy days.
Prep: measure water, salt generously, set portions
Choose a big pot for better water flow. Fill it with enough water to cover the pasta. Add lots of salt for flavor.
Measure pasta by weight or use a 2-ounce serving per person. This helps avoid too much pasta.
Execution: two-minute boil, cover and rest—timing and stirring tips
Boil water until it’s rolling, then add pasta and stir. Keep boiling for two minutes, stirring a bit. Turn off the heat and cover for 10 minutes.
Stir once more before covering to stop clumping. Taste a noodle to check if it’s done. Thinner shapes might be ready sooner.
If it’s not done, boil it a bit longer. Save some pasta water for sauce.
Troubleshooting: adjust rest time and mind the lid fit
If pasta is too soft, boil it a bit longer. If it’s too hard, rest it less. A tight lid is key for even cooking.
Gluten-free pasta might need slight adjustments. Stir well before covering and toss with sauce to avoid sticking.
For more tips, check out this article on the viral pasta method.
How to Brown Butter Perfectly Every Time (Beurre Noisette)
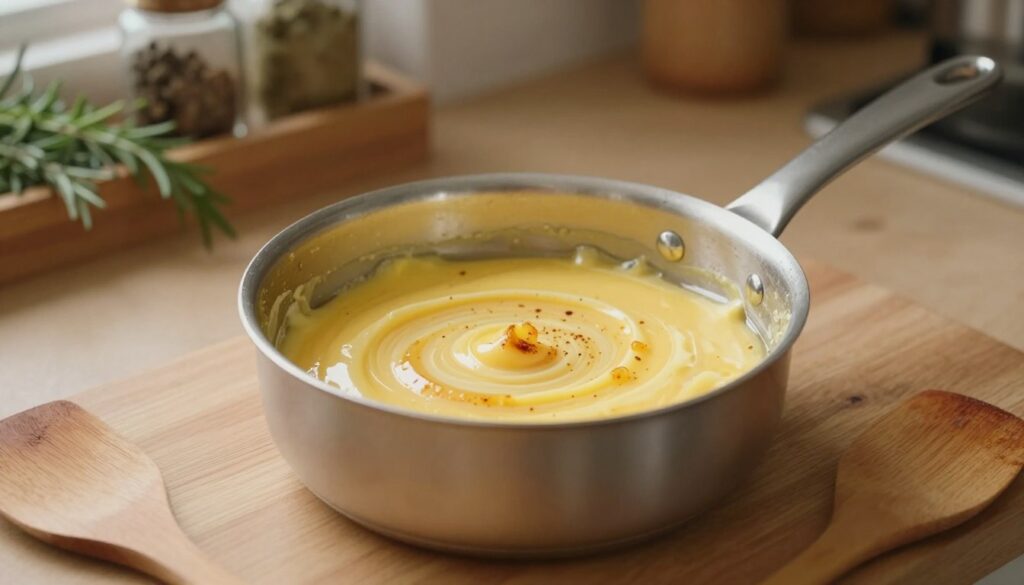
Learning to brown butter, or beurre noisette, can elevate your cooking at home. It turns regular butter into a rich, nutty flavor. This flavor enhances dishes like pasta, seafood, veggies, and baked goods.
Science of browning butter
Butter starts to brown around 250°F. At this point, its water evaporates, and milk solids toast. These solids undergo a chemical reaction called Maillard chemistry. This reaction creates the butter’s toasted hazelnut scent and amber specks, signaling it’s ready.
Precise steps to get it right
Start by cutting unsalted butter into even pieces. This ensures it melts evenly. Use a stainless steel or enamel pan and keep it cold. Heat it on medium, letting the butter melt and foam.
Swirl the pan gently as the butter foams. Watch for the milk solids to darken. This is your amber window, lasting about thirty seconds. Remove the pan once you see amber specks and smell a nutty aroma.
How to stop the cook fast
To stop the butter from browning too much, transfer it to a heatproof bowl immediately. For bigger batches, add cold cream or an ice cube to stop cooking fast. These quick actions prevent the butter from becoming burnt and bitter.
Storage and use
Cool the browned butter slightly before pouring it into a glass jar. Store it in the fridge for up to two weeks. Freeze it in ice-cube trays for longer storage. Always save the browned milk solids for extra flavor in dishes.
Ingredients and common pitfalls
Use unsalted butter for better control. Salted butter browns faster and tastes saltier. Plant-based spreads and margarine don’t have the right proteins for true browned butter. Be careful not to use high heat and don’t leave the stove unattended, as the butter can quickly go from perfect to burnt.
Applying the Technique to Different Cooking Styles and Recipes
Learning the timing and heat control of this viral method opens up many dishes. It shows how popular cooking methods and trending tricks lead to delicious food.
Pasta finishes that cling
Save a cup of starchy water before draining pasta. The two-minute boil method works well here. Mix hot pasta with sauce and a bit of saved water.
This step makes the sauce silky and glossy. It coats each noodle perfectly, giving food a restaurant-like texture.
Seafood and proteins with browned butter
Try browned butter for quick dishes like browned butter garlic shrimp. Brown butter and garlic for a great smell. Add lime or sazón, then toss in shrimp until they’re opaque.
This method takes under 15 minutes. The nutty butter adds a caramelized edge to proteins while keeping them tender. It’s a simple way to add big flavor.
Vegetables and rice boosted by residual heat
Finish roasted or sautéed veggies with browned butter off the heat. For rice, toast grains in browned butter before adding stock for pilaf. Or stir in butter at the end for warmth and nuttiness.
Residual heat helps cook ingredients without overcooking. These simple steps make basic sides into bold meal components. They’re tricks used by both home cooks and chefs.
Versatile pairings and finishing notes
Add brightness with citrus, fresh herbs, or flaky sea salt. Use bold spices like cumin or scotch bonnet for flavor. Browned butter is great as a cooking fat and a finishing drizzle for grilled fish, roasted sweet potatoes, soups, and baked goods.
These practical pairings help you use recipe secrets in weeknight cooking. Small tweaks make the technique flexible and consistent for perfectly cooked food.
Adjusting the Viral Technique for Various Ingredients and Diets
You can make the viral carryover-cooking method work for many diets and ingredients with a few tweaks. Start by testing times and fits to learn how lid tightness, pot size, and resting affect texture. This method is practical and foolproof if you follow small checks and adjust for each component.
Gluten-free pasta: what to test and expect
Some gluten-free pasta brands work well with the two-minute boil trick. In trials, one brand reached the perfect texture without clumps. But, outcomes vary by flour blend and shape, so use gluten-free pasta tips: stir well at the start, adjust the resting time, and taste-test a strand before serving.
When trying different shapes, note that thin strands release starch quickly, while large shapes hold more paste. If clumping appears, add a splash of water and stir during the rest, or finish with a brief return to heat. These small moves make this cooking method reliable for beginners.
Butter choices and plant-based swaps
Unsalted butter is the default for controlled browning. Salted butter will brown faster and raise final saltiness, so cut back on added salt if you use it. Real butter contains milk proteins and sugars that drive Maillard reactions and the nutty notes you expect.
Plant-based cooking often needs a different approach. Margarines and many vegan spreads lack the proteins and lactose needed to brown like dairy butter. To get similar nuttiness, toast nuts, use browned coconut oil, or finish with sesame or walnut oil. These substitutes change aroma and chemistry, so treat them as flavor partners rather than exact replacements.
Scaling quantities and adapting to shapes and vegetables
When scaling recipes, prioritize even heat distribution. Increase water volume and use a larger pot or split into batches to avoid crowding. This simple habit keeps the viral technique consistent when you double or triple servings.
Thicker pasta shapes often need an extra minute or two of resting or a brief simmer to finish. Dense vegetables benefit from pre-roasting or a quick blanch so residual heat can complete cooking without overbrowning. For protein-heavy dishes, marinate with acid to reduce harmful high-heat byproducts and keep textures tender.
Diet-specific tips and finishing touches
For dairy-free diets, recreate some brown-butter notes with browned coconut oil or toasted nut oils, while understanding the difference in flavor. Low-sodium cooking favors unsalted butter and bright acids, herbs, or garlic to lift flavor without added salt.
Use this link for a short read on how cooking temperature and moisture affect byproducts and long-term health: how heat and moisture change cooked. Apply those principles when you scale recipes or switch to plant-based cooking to protect nutrients and reduce unwanted compounds.
| Adjustment | Small Batch | Scaled Up |
|---|---|---|
| Pot size / water | Use one-pot, snug fit | Increase water; larger pot or multiple batches |
| Rest time for thick shapes | Follow base resting time | Add 1–3 minutes or brief low heat return |
| Gluten-free handling | Stir often; test brand | Extend rest; separate strands if clumping |
| Dairy-free finish | Browned coconut or toasted nuts | Use toasted oils and finish with acid and herbs |
Common Mistakes and How to Avoid Them for Foolproof Cooking
Even the best recipes can go wrong with small errors. Knowing these mistakes helps you avoid them. This way, you can make the two-minute pasta trick and browned butter work every time. Just read the signs, use simple fixes, and practice a few easy cooking hacks to boost your confidence.
Loose lids let steam escape, ruining the cooking method. If your pasta is still undercooked after resting, the lid might have leaked. Try using a heavier lid, a Dutch oven, or foil to keep the steam in. For foolproof cooking, check the lid fit before turning off the heat.
Overcrowding prevents even heat circulation. When you put too much pasta in a pot, it sticks and cooks unevenly. Keep a good pasta-to-water ratio and let the strands spread out. In a sauté pan, use fewer pieces to keep the surface temperature high and achieve proper browning.
Burnt butter smells acrid and happens quickly. Watch for amber specks and a toasted-hazelnut aroma; stop cooking once you see that color. If the butter turns dark brown, remove it from heat and strain to catch the burnt bits. Slightly over-browned butter can work in bold sauces, but truly burnt butter should be thrown away.
Trust your senses more than a timer. Taste a noodle after resting to check if it’s done. Use color and aroma to judge the beurre noisette. These sensory checks are the most reliable kitchen tips and tricks for adjusting timing to your stove and cookware.
Quick rescues are often possible. If pasta is underdone, bring it back to a low boil for one to three minutes. For sticking pasta, stir in the first minute before covering. To stop butter from cooking further in larger batches, add an ice cube or a splash of cold cream to lower the temperature instantly.
Remember these common cooking mistakes and apply the fixes as you cook. Small adjustments can turn a risky attempt into a consistent, foolproof cooking method you can repeat with confidence.
Flavor-Boosting Variations and Trending Culinary Tricks
Small changes can make weeknight meals taste fancy. Browned butter adds a toasty, nutty flavor to simple dishes. Adding bright acids and fresh herbs makes these dishes unforgettable.
Try Caribbean-inspired cooking with browned butter. Use it for tostones or rice. For tostones, brush or baste during the second fry for extra crispiness. For rice, toast grains in browned butter before simmering for a savory pilaf.
When making sofrito, add browned butter near the end. This blends its nutty notes with garlic, cilantro, and lime. It’s a fresh twist on classic flavors.
Finishing touches are key. A squeeze of lemon or lime brightens sauces. Sprinkle chopped cilantro or parsley before serving. A pinch of flaky sea salt adds contrast and enhances flavors.
For pasta, save starchy cooking water. Mix it with browned butter and add lemon. This makes the sauce glossy and balanced. These touches can elevate a simple dish.
Meal-prep tips make this technique easy. Make large batches of browned butter and store in glass jars. Freeze portions in ice-cube trays for quick use.
Thaw frozen portions gently to avoid re-browning. Label jars and cubes with the date. This helps you use the oldest first and saves time.
Below is a quick guide on using browned butter in Caribbean and everyday dishes. It also covers the best storage methods for busy cooks.
| Use | How to Apply | Storage |
|---|---|---|
| Tostones | Baste during second fry or toss with chopped garlic and lime after frying | Refrigerate up to 1 week; reheat briefly in a skillet |
| Dominican-style rice | Toast rice in browned butter before adding liquid; stir a spoonful in at finish | Refrigerate in airtight jar up to 2 weeks; freeze portions 3 months |
| Sofrito-based stews | Add browned butter toward end to layer nutty notes with garlic and sazón | Keep jars chilled and use within 2 weeks; freeze cubes for single servings |
| Pasta sauce | Emulsify browned butter with reserved pasta water and a squeeze of lemon | Store chilled up to 2 weeks; reheat gently to avoid separation |
| Finishing drizzle | Drizzle warm browned butter over roasted veg, fish, or grilled meats; top with herbs and flaky salt | Room temperature for short service; refrigerate leftovers in jars |
How to Practice and Master the Technique: Tips for Beginners
Start with small steps and short builds that focus on key skills. These recipes help you practice timing, heat control, and carryover without long prep. Keep your practice sessions short, 30–45 minutes, to stay focused and learn quickly.
Practice recipe 1: Cook two-minute boil pasta with reserved pasta water and brown-butter sauce. Measure water and salt, time the boil, then cover and rest. See how the sauce mixes with starchy water and how texture changes during rest.
Practice recipe 2: Browned-butter garlic shrimp. Brown unsalted butter in a light-colored pan until amber specks appear, add garlic and peeled shrimp, cook until opaque, finish with lime and cilantro. This helps you learn to watch color and aroma, not just the timer.
Practice recipe 3: Rice pilaf toasted in browned butter. Toast rice, add hot stock, simmer with a fitted lid, then finish with a spoonful of browned butter for depth. This teaches you how lid fit and resting time alter final texture.
Learn to use visual and tasting cues instead of just clocks. Pasta should look plump and slightly glossy, with a gentle al dente bite. Browned butter develops nutty aroma and tiny amber solids. Proteins turn opaque and gain slight firmness. Use a quick taste test at the end of each critical window to confirm doneness.
Keep a simple cooking log for tracking cooking results. Note pan type, lid fit, water volume, pasta brand and shape, initial boil time, resting time, and the final texture. Record one clear lesson per cook so you build a practical reference you can trust.
Make small adjustments between attempts. Change resting time by ±1 minute, tweak heat a notch, or swap to a tighter-fitting lid to see how outcomes shift. These micro-experiments show you how cookware and brands affect results and teach you how to master cooking techniques for consistent plates.
Use beginner-friendly controls: choose unsalted butter, pick light-colored pans to read color, avoid overcrowding, and practice stopping techniques like transferring browned butter off heat or adding an ice cube. Repeat the three practice recipes until muscle memory forms.
By combining short, focused practice recipes with tasting, visual checks, and a simple log for tracking cooking results, you develop confidence and a repeatable path to mastering cooking techniques that work in your kitchen.
Conclusion
The viral cooking technique we’ve talked about is based on simple food science. It uses the two-minute pasta boil and browned butter. This method is reliable and can be done in any kitchen.
It’s all about the details. Use a tight-sealing lid to keep the pasta warm. Choose light-colored pans and unsalted butter to control the browning. And don’t forget to use reserved pasta water for your sauces.
Start with simple recipes like pasta, garlic shrimp, or rice. Pay attention to how things taste and smell, not just the timer. Make small adjustments to get the best results. And keep browned butter on hand for quick meals.
These tips aren’t just fleeting trends. They’re lasting cooking habits that help you cook perfectly every time.